Thanks for visiting my blog! See more about me here: About Me
In this second part of my Architecting Windows Phone 7 applications, I want to tackle the use of the Pivot and Panorama control. If you missed the first part of the series, you you can visit it here:
As I’ve seen, many developers want to use these controls so determining the best path here is an important discussion.
Both of these controls work in similar ways in that they have sub-content areas. For example, the Panorama allows you to specify a variable number of panels (or PanoramaItem objects) inside the panorama that make up the control. The default Panorama project type presents a basic design like below (though I am simplified the code by using Resource based DataTemplates to clean up the XAML):
<c:Panorama Title="my application"
            Background="{StaticResource backBrush}">

  <c:PanoramaItem Header="first item">
    <ListBox Margin="0,0,-12,0"
             ItemsSource="{Binding Items}"
             ItemTemplate="{StaticResource firstListBoxTemplate}" />
  </c:PanoramaItem>

  <c:PanoramaItem Header="second item">
    <ListBox Margin="0,0,-12,0"
             ItemsSource="{Binding Items}"
             ItemTemplate="{StaticResource secondListBoxTemplate}" />
  </c:PanoramaItem>

</c:Panorama>
Each of these PanoramaItem objects inside the Panorama control are simply content controls that can contain arbitrary XAML. So the example here (and others) use in-line XAML to design these items. The Pivot does this same thing but with PivotItem objects:
<c:Pivot Title="MY APPLICATION">

  <c:PivotItem Header="first">
    <ListBox x:Name="FirstListBox"
              Margin="0,0,-12,0"
              ItemsSource="{Binding Items}"
              ItemTemplate="{StaticResource firstDataTemplate}" />
  </c:PivotItem>

  <c:PivotItem Header="second">
    <ListBox x:Name="SecondListBox"
              Margin="0,0,-12,0"
              ItemsSource="{Binding Items}"
              ItemTemplate="{StaticResource secondDataTemplate}" />
  </c:PivotItem>

</c:Pivot>
While if you are working with simple ListBoxes (like this example), its a pretty simple app you are building, but for many of us we need more complex user interfaces on each of these panels. That is why in almost every case I suggest that you refactor these into view classes. By using arbitrary XAML, it becomes pretty easy to couple your application into one large XAML file and that becomes a problem with flexibility and maintenance.
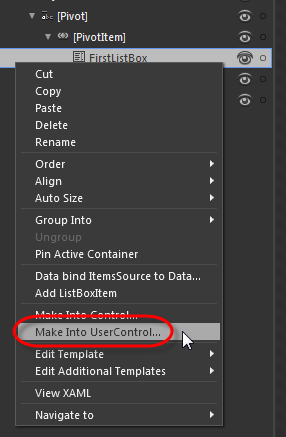
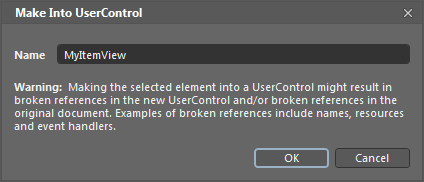
If you are already doing this, Blend can come to the rescue and help you with part of the problem in case you didn’t know. In Blend you can take any single control (or a container and its contents) and right-click to select “Make into UserControl”:
This allows you to refactor your XAML content into a ‘view’:
This view is then replaced in the XAML and points to the new control:
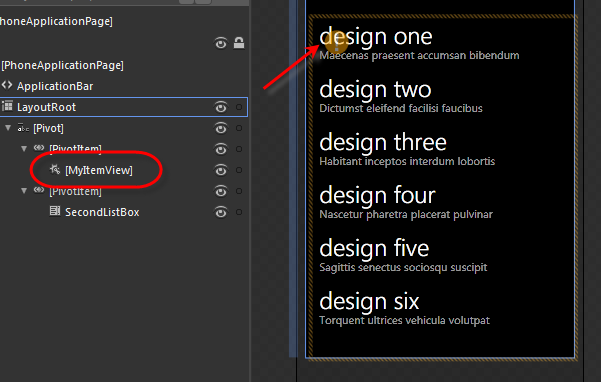
The design-time experience here shows a preview of what Blend expects the view to look like (based on what it last looked like) but shows a yellow circle with an exclamation to say that it might not be right until you build.
Refactoring your ad-hoc XAML into a view won’t bring the code, but only the XAML. But it does bring over any data binding you did. So if you are using a sensible model and view-model (as I’ll be speaking about in subsequent articles), then the data binding flows through the design. The chain of DataContext can easily cross the UserControl boundary or you could use your own view-model against this view. Both are viable avenues.
The big take-away here is that Pivot and Panorama controls don’t change basic patterns of good containment and separation of concerns. I think that the Pivot and Panorama make excellent ways to build your ‘Shell’ of your application, but you will still need to be cognisant of your architectural principals and not just shove all your XAML and code in a single class/file. By separating your views when using these views you can more easily change the shell to a different metaphor (e.g. Pages or Tabs) without changing the basics of your application design. This happened to me on the “Stay Glucose to Me” application that I built for the Marketplace. I started with a Panorama control and then decided that it made more sense to handle it as a Pivot control and Pages. Changing the application to the new metaphor became simple.
