Thanks for visiting my blog! See more about me here: About Me

Assuming you read my last post, you should be ready to take your ASP.NET Core project and deploy it to Azure App Services. This post, I’ll walk you through the process.
Much of what I will show you can certainly be done with the Azure CLI, but I’m not fancy, so I’ll show you in the Azure portal. Hopefully that won’t ruin my cool quotient among developers ; )
The Series
This will be a three part series:
Getting an ASP.NET Core project running on Docker Desktop (here)
Deploying Docker Images to Azure App Services (this post)
Automating Docker Image Deployment with GitHub Actions (here)
Deploying Docker Images to Azure App Services
To get started, you’ll need to do couple of things:
Create a Container Registry
Push your container to the registry
Create the Azure App Service
Let’s do just that.
Create an Azure Container Registry
A container registry is essentially a place to hold containers for deployment. It’s a lot like Git for containers. It can hold multiple versions of a container.
In our example, I’m going to use an Azure Container Registry. You could use a Docker registry or a private registry, but if you’re getting started, an Azure one is pretty simple.
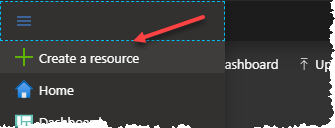
To start out, open the menu and pick “Create a Resource”:
Pick “Containers” option and you’ll see the Container Registry option:
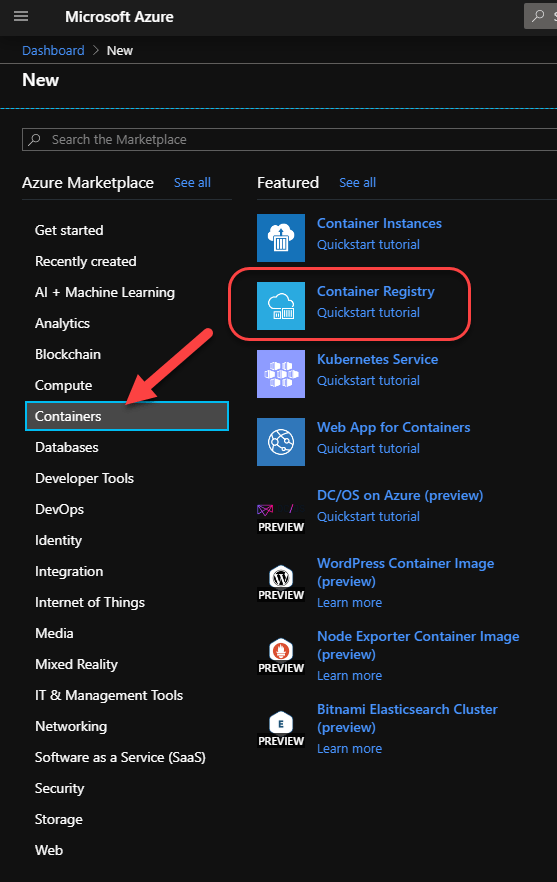
If you click on “Container Registry”, it will open options to create a new registry. I tend to create a registry per project but that’s not necessarily the right thing to do:
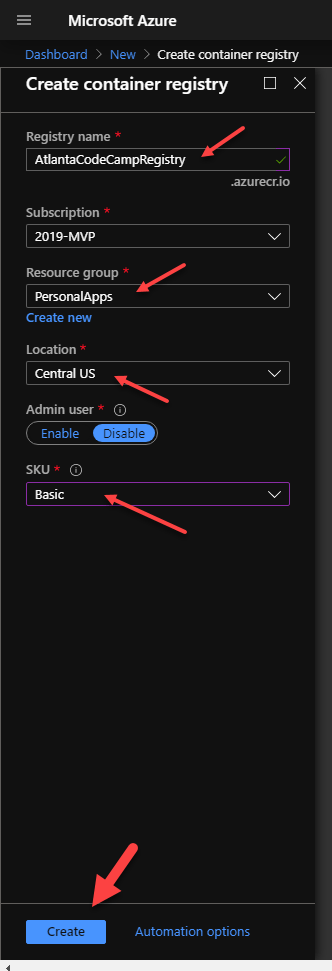
Now that you have the options, name your registry, pick a resource group, a physical location (I like to have my registry in the same area as my servers), and finally choose the SKU (I usually use Basic since performance of deploying to a registry isn’t a big concern for me). The SKU’s are the same except that the higher you pick, the faster they are.
If you’re not that familiar with Azure, a resource group is just an arbitrary grouping of services together. In my case, I use a personal apps resource group for non-work related projects.
Once you’re done, just press “Create” and wait for it to complete making the registry.
Push your container to the registry
Once the registry is created, you can now push your container to the registry. This is done in several steps. First, open the registry to find out the URL to the registry:

In my case that’s atlantacodecampregistry.azurecr.io (That’s Azure Container Registry’s domain). So I can push my new container to the registry by opening up a command-prompt in my project and typing:
> docker build .. -f ./Dockerfile -t atlcc:latestThis command builds your docker image and labels it with a name and a ‘version’ (or tag). This is happening locally on your machine. The oddity of the command comes from the fact that the docker image created by Visual Studio wants to run in the base directory of your solution file and then we need to tell it what dockerfile to use (in this case the one in our project folder).
Once you complete the build, you’ll get a message like this:
Successfully built a4a84c42c136
Successfully tagged atlcc:latest
SECURITY WARNING: You are building a Docker image from
Windows against a non-Windows Docker host. All files
and directories added to build context will have
'-rwxr-xr-x' permissions. It is recommended to double
check and reset permissions for sensitive files
and directories.
This warning is just because you’re building a Linux container on a Windows box. Don’t worry about it. It’s fine.
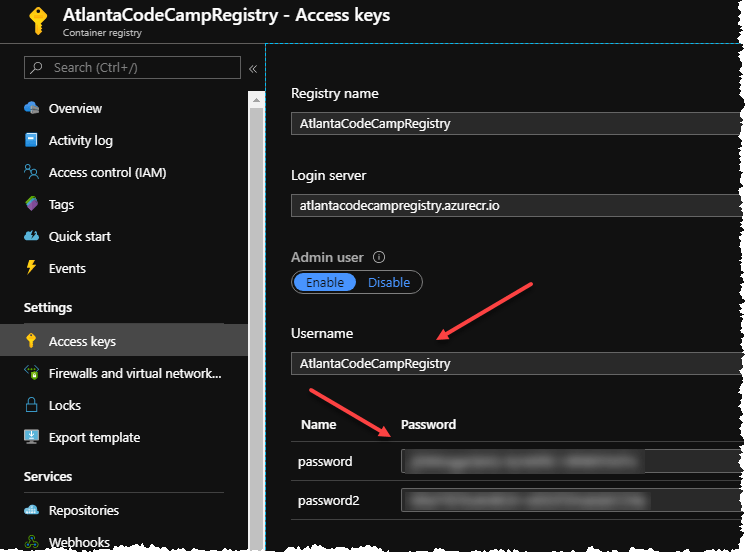
Now that we’ve build it, we need to log into the registry. Before we can do this, I usually enable the classic admin account. You should use individual accounts if more than one person is using it. But since it’s just me, I turn this on in the “Access Keys” of the registry:
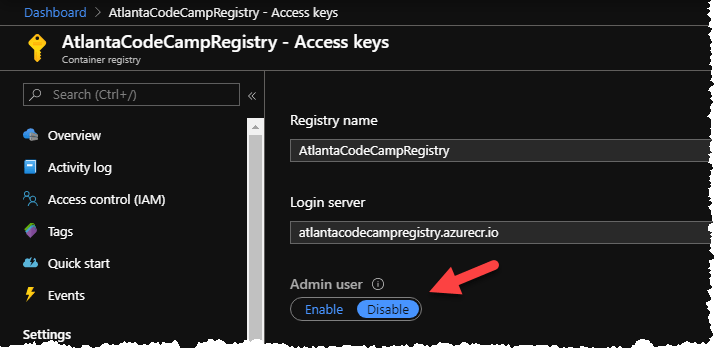
Once you turn this on, you can change the user name and copy the password (which I’ve blurred out for obvious reasons):
Now that you have the username/password, you can login to the registry using the docker command:
> docker login atlantacodecampregistry.azurecr.ioThis will prompt you for the username/password of the registry:
[D:\projects\CoreCodeCamp\src\CoreCodeCamp>] docker login atlantacodecampregistry.azurecr.io
Username: AtlantaCodeCampRegistry
Password:
Login Succeeded
Now we tag our container with our remote container name:
> docker tag atlcc:latest atlantacodecampregistry.azurecr.io/atlcc:latest Notice the name of the registry prefixes the name.
Now that it’s tagged, we can push it will which copy the container into the registry:
> docker push atlantacodecampregistry.azurecr.io/atlcc:latestThis will copy the container up (by copying each iteration of the container parts). Subsequent pushes will be faster. It’ll look something like this:
[D:\projects\CoreCodeCamp\src\CoreCodeCamp>] docker push
atlantacodecampregistry.azurecr.io/atlcc:latest
The push refers to repository [atlantacodecampregistry.azurecr.io/atlcc]
dda1a6bafec2: Pushed
d2daf20f3b13: Pushed
5788d77a8c40: Pushed
a2f9ed91e120: Pushed
75bb365bb264: Pushed
99b5261d397c: Pushed
latest: digest: ... size: 1582
Now we’re ready to create the app service!
Create an App Service for a Docker Image
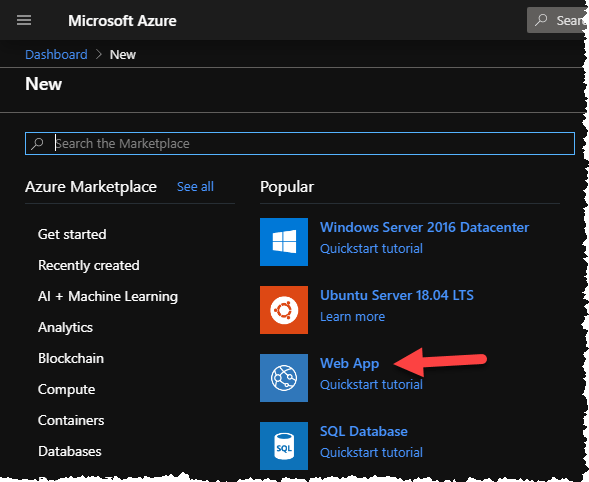
Go back to the Create Resource item:
Pick the “Web App” option:
Next you’ll be setting up your new App Service. In order to use a Docker container, make sure your “Publish” setting is set to Docker Container. Unless you really need Windows as a container, I suggest just using Linux.
You’ll want to pick (or create a resource group) for this App Service.
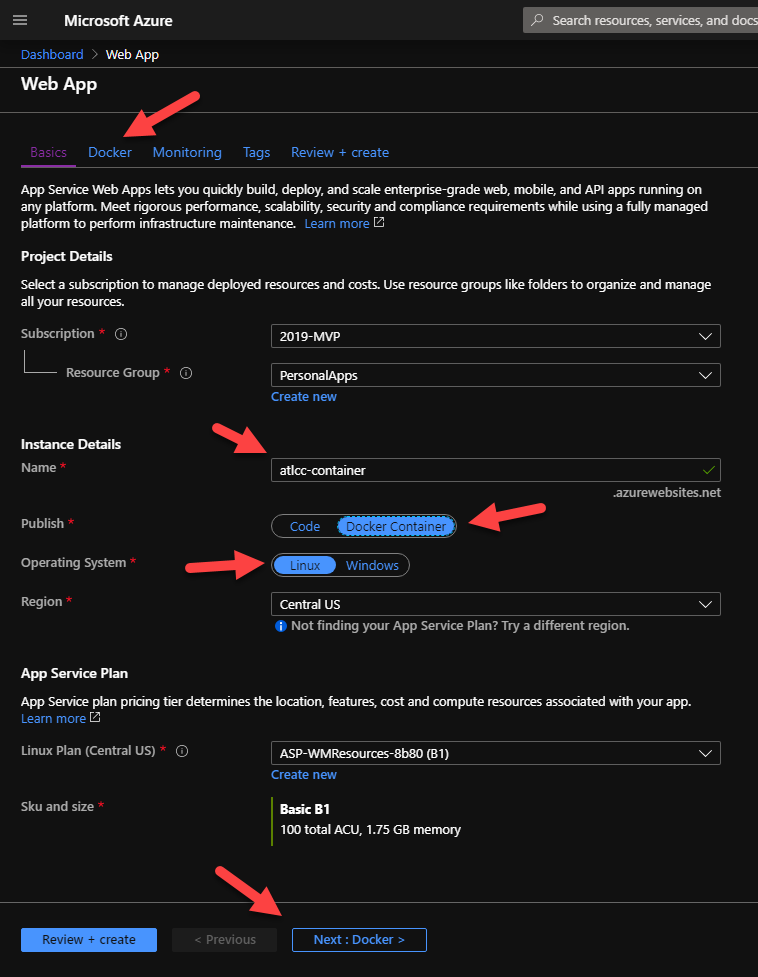
Press Next to go to Docker settings:
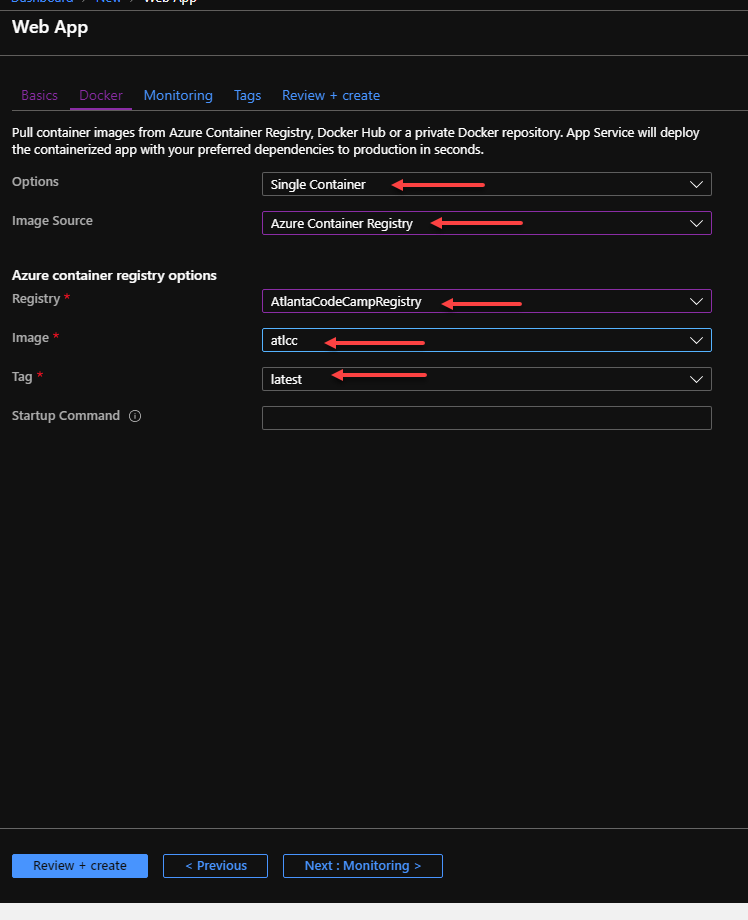
Pick single container (App Services has a beta version of using dockercompose too, but I haven’t used it yet), pick the Azure Container Registry, then pick your registry, image and the tag you used.
Finally press “Review + Create” to create the site. It will take a few minutes to create the site. Once you’re done you can visit it by going to your site name + azurewebsites.net (e.g. https://helloworldfilm.azurewebsites.com).
Repeating the Deployment
As you make changes you’ll need to repeated some of the steps. I usually just make a script to do something like this:
# push.ps1
$ver = $args[0]<br>docker build . -t yoursite:$ver
docker login yoursiteregistry.azurecr.io
docker tag yoursite:$ver yoursiteregistry.azurecr.io/yoursite:latest
docker push yoursiteregistry.azurecr.io/yoursite:latest
The deployment of your container won’t happen automatically once you have a new container. Usually I turn on this feature in my app service by going to:
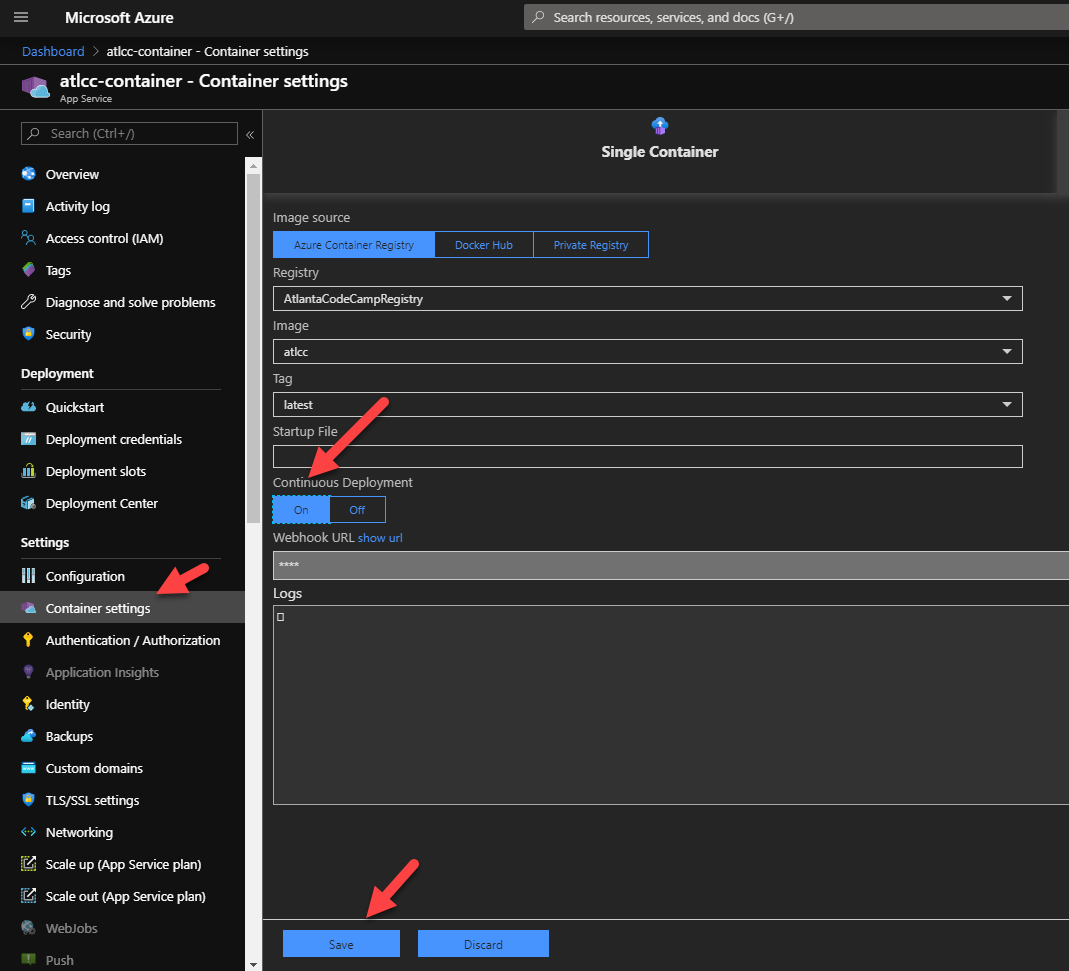
Once this is on every time you push the ‘latest’ tag, it will redeploy the project!
Hope this helps. Next time we’ll talk about automating deployment when you check in code to GitHub!
