Thanks for visiting my blog!

If you’ve seen my projects or courses over the last few years, I had been advocating for using NPM for client-side libraries and SPAs at the same time. This caused the need to merge generated packages.json files. This added to the complexity. In addition, to handle the client-side libraries with NPM, you needed a way to both read the node_modules folder during development. This was handled with some middle-ware created by the late, great @OdeToCode (K. Scott Allen).
As I’m updating some of my Pluralsight courses, I’m changing them to use this simpler approach. Here’s what I am proposing instead.
Client Side Libraries
The old advice of using NPM to define client-side libraries made sense to me, but it came with some drawbacks:
- Visual Studio/VS Code had a hard time with intellisense of the node_modules folder.
- You needed an additional step (usually introducing Gulp) for publishing your project. It was one more technology to stay up to date on.
- The number of files needed was almost always way more than necessary.
- Going from NPM to CDNs wasn’t simple enough.
I think I prefer now to use simple management of these libraries. I’ve realized that for many projects, the number of these files is pretty small and the multiple moving pieces wasn’t necessary just to use a couple of libraries.
Instead, I’m recommending one of three approaches:
- If you’re using Visual Studio, Library Manager simplifies including these libraries.
- Use CDNs instead of including the libraries.
- Manually include them in your project.
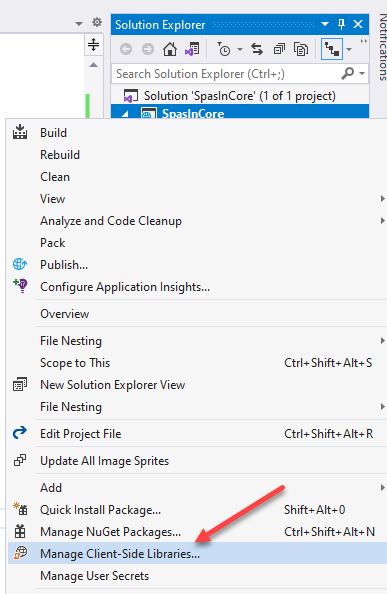
Library Manager supports both Visual Studio integration and the libman CLI tool. If you’re using Visual Studio, you can get started by just right-clicking on the project and selecting “Manage Client-Side Libraries…”:
Once you do that it’ll create a new project called “libman.json”:
{
"version": "1.0",
"defaultProvider": "cdnjs",
"libraries": [
]
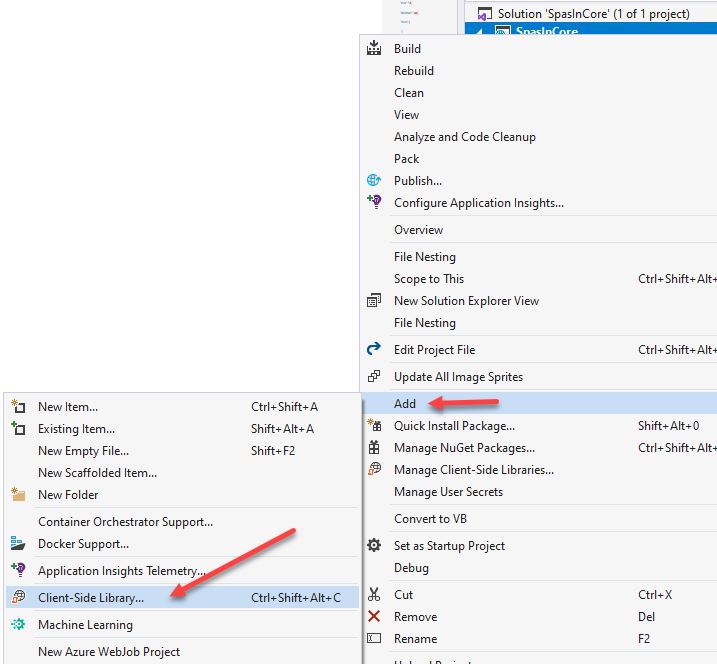
}While you can manage this file manually, I’d use the tooling to do it instead. For example, to add a new library, you can right-click the project and pick Add->Client-Side Library:
This will bring up a dialog that allows you to specify the library:
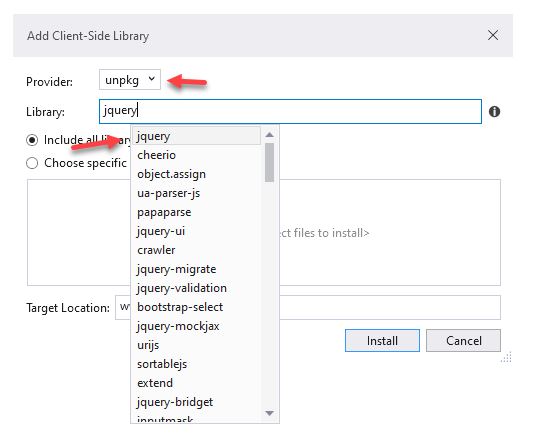
Note, you can specify the provider (I prefer unpkg, but it doesn’t matter which one) and type in the library name. You’ll see a dropdown of possible libraries and once you tab out of the Library, it’ll add the version number of the latest version (you can specify the version number with an @ symbol):
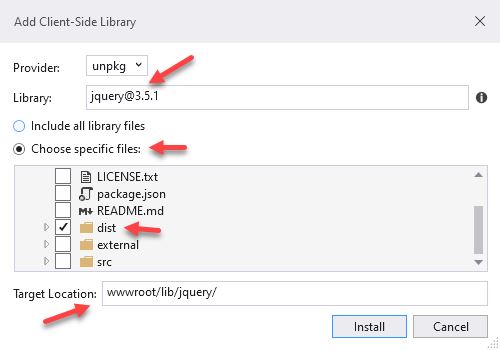
Additionally, you can pick what files to include (I usually just get the ‘dist’ folder of packages). Lastly, I pick where I want to install it, but by default it picks a lib folder under wwwroot.
Library Manager can refresh the libraries or upgrade them as well. But this way it’s pretty simple to manage the files for development or production.
But SPAs are a bit different.
Using SPAs
In my new thinking about this, I usually plan on doing a SPA (e.g. Angular, Vue, React) in a sub-folder of the project. In my example, I do this in ng-cient and vue-client folders. The idea is to tell the SPA project to build directly into the wwwroot folder. To show you how this works, let’s walk through it with Angular and Vue.js.
Angular
In angular, the result of the building of the project is normally built in a subdirectory of the Angular project called dist. You can find where this is set via the angular.json file:
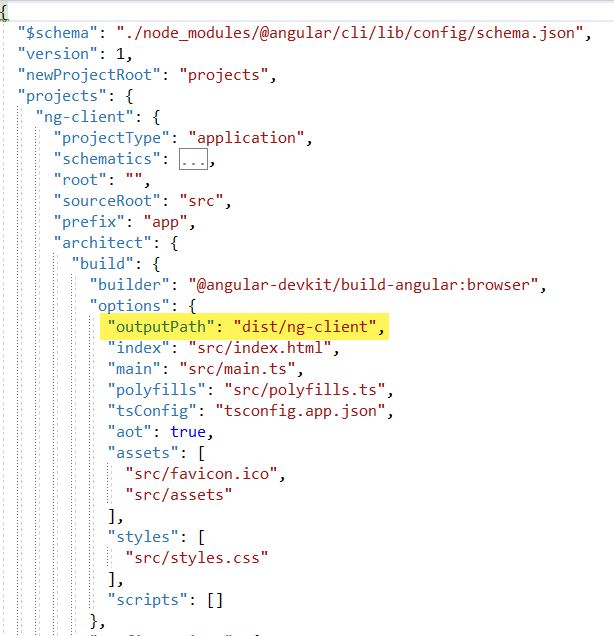
The trick here is to change this to be inside the wwwroot directory:
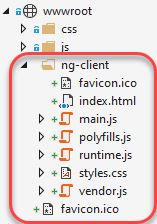
"outputPath": "..\\wwwroot\\ng-client",In this case, the Angular project is a subdirectory of the ASP.NET Core project. By specifying one folder down and then up to wwwroot, I can create the result of the Angular build to be accessible from the ASP.NET Core project. You end up with the files in wwwroot:
Once you do this, you can now just use relative links to this new directory structure:
@page
@section Scripts {
  <script src="~/ng-client/runtime.js"></script>
  <script src="~/ng-client/polyfills.js"></script>
  <script src="~/ng-client/vendor.js"></script>
  <script src="~/ng-client/main.js"></script>
}
@section Head {
  <link href="~/ng-client/styles.css" rel="stylesheet" />
}
<div>
  <app-root></app-root>
</div>
We can do the same in most SPA frameworks. Let’s see how it works in Vue.
Vue
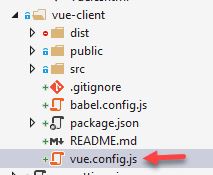
For Vue it’s a little bit more complicated as the configuration file doesn’t exist by default. You should just create a new file in the Vue project folder called vue.config.js:
Once you create this, you’ll want to export an object with properties of outputDir (for the output folder) and turn off filenameHashing to prevent the production version from having hashing:
// vue.config.js
module.exports = {
outputDir: "..\\wwwroot\\vue-client",
filenameHashing: false
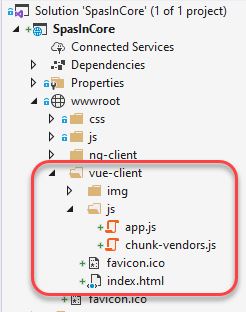
}When you build the project, you should see the files now created it it’s own directory:
Then you can use it like any other project:
@page
@section Scripts {
  <script src="~/vue-client/js/chunk-vendors.js"></script>
  <script src="~/vue-client/js/app.js"></script>
}
<div>
  <div id="app"></div>
</div>
This is similar with most SPA frameworks.
Conclusion
You can get an example from Github here:
I hope this helps you see how I was wrong and maybe improve your process, especially if you learned from my courses.
